 Creating chocolate designs can be a fun and creative process, whether you’re working with chocolate molds, hand-painting with colored cocoa butter, or crafting intricate decorations. Here are some popular chocolate design techniques and ideas:
1. Chocolate Molds
- Shapes and Themes: Use molds in various shapes such as hearts, stars, animals, flowers, or holiday-themed designs.
- Layered Colors: Pour different colored chocolates (white, milk, dark) into molds in layers to create a marbled or layered effect.
- Filled Chocolates: Use molds to create filled chocolates with ganache, caramel, fruit puree, or nuts.
2. Hand-Painting with Cocoa Butter
- Colored Cocoa Butter: Use colored cocoa butter to paint designs inside molds before pouring in the chocolate. This can create beautiful, intricate designs on the surface of the chocolates.
- Freehand Designs: Paint directly onto finished chocolates for a more artisanal look.
3. Chocolate Transfers
- Transfer Sheets: Use transfer sheets with pre-printed designs that can be transferred to the chocolate’s surface. These are great for creating professional-looking designs quickly.
- Custom Transfers: Create custom transfer designs using acetate sheets and colored cocoa butter.
4. Piping and Drizzling
- Piping Designs: Pipe melted chocolate onto parchment paper in various shapes and designs, then allow to harden before using as decorations.
- Drizzling: Drizzle contrasting chocolate over chocolate pieces for a decorative touch.
5. Textured Chocolates
- Texture Mats: Use textured mats or rolling pins to create patterns on the surface of chocolate slabs or pieces.
- Embossing: Use embossing tools to press patterns into the chocolate.
6. Chocolate Sculptures
- 3D Sculptures: Create 3D sculptures or figurines using tempered chocolate and various sculpting tools.
- Chocolate Flowers: Craft chocolate flowers and leaves for cake decorations or standalone pieces.
7. Ganache and Truffles
- Decorative Truffles: Roll truffles in cocoa powder, chopped nuts, or sprinkles for different textures and flavors.
- Ganache Decorations: Use flavored ganache fillings and decorate the tops with edible gold leaf, chocolate shavings, or crushed candies.
8. Marbled Chocolate
- Marbling Technique: Swirl different types of melted chocolate together to create a marbled effect. This can be done with bars, slabs, or individual pieces.
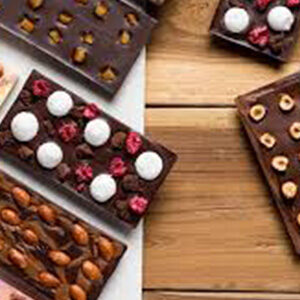
9. Chocolate Barks
- Mixed Toppings: Spread melted chocolate on a sheet and top with a variety of toppings like dried fruits, nuts, seeds, or candies.
- Layered Barks: Create multi-layered barks with different types of chocolate and toppings in each layer.
Tools and Supplies
- Silicone Molds: For easy release of chocolate shapes.
- Acetate Sheets: For transfer designs and smooth finishes.
- Cocoa Butter Colors: For hand-painting and custom transfers.
- Piping Bags: For precise chocolate designs.
- Palette Knives and Brushes: For spreading and painting chocolate.
Tips for Working with Chocolate
- Tempering: Properly temper your chocolate to ensure it has a smooth texture and shiny finish.
- Storage: Store finished chocolates in a cool, dry place away from direct sunlight to prevent melting and blooming.
- Experiment: Don’t be afraid to experiment with different techniques and combinations to find your unique style.
Creating beautiful chocolate designs can be both a delightful hobby and a professional craft. Enjoy the process and the delicious results!
Recent Comments